
Cheese cubes are a staple in charcuterie boards, lunchboxes, party trays, and snack packaging. Their neat, geometric form and rich color make them perfect for food illustrations, infographics, or branded merchandise. Whether you’re drawing them as realistic dairy bites or cartoon snack icons, this guide walks you through creating clean, appetizing cheese cube drawings that pop off the page.
Table of Contents
Why Draw “Cheese Cubes”?
Represent Everyday Snacks and Meal Prep
Cheese cubes are relatable and versatile. Drawing them is ideal for food bloggers, recipe designers, and diet app creators looking to illustrate healthy, portioned foods.
Practice Geometric Shapes and Texture
With their perfect cubic structure, cheese cubes help you work on angles, edges, shadows, and surface texture in a controlled, simple form.
Great for Packaging Art, Infographics, or Charcuterie Boards
A clean, appealing cheese cube can anchor a food diagram or enhance illustrated menus with visual precision and flavor appeal.
Best Tips for Drawing “Cheese Cubes”
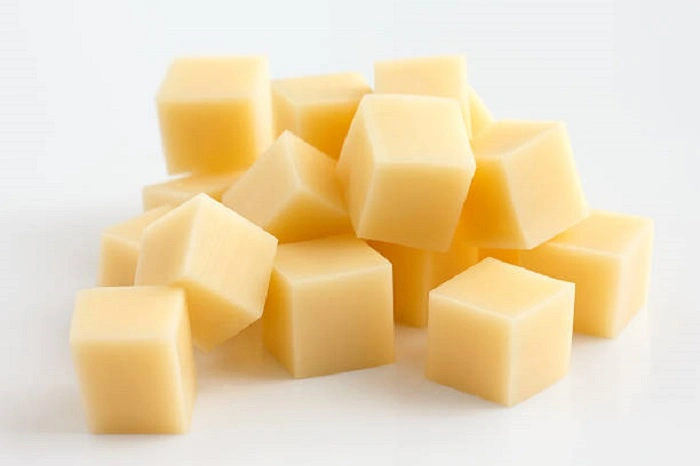
1. Start with a Solid Cube Structure
Cheese cubes are all about clean lines and 3D perspective. Begin with a basic cube.
How to Do It:
- Use a slightly tilted square for the top face.
- Add vertical lines downward for the sides, matching perspective.
- Complete the sides with parallel lines—keeping edges straight and crisp.
2. Define the Cheese Type by Texture and Color
Different cheese cubes—cheddar, gouda, mozzarella—look slightly different.
How to Do It:
- Cheddar Cubes: Use a rich golden-orange with a smooth texture.
- Swiss or Mozzarella Cubes: Use pale cream or white with a matte look.
- Pepper Jack: Add tiny green/red specks to a soft yellow cube.
3. Add Shading and Highlights for Depth
Give each cube volume by simulating light and shadow.
How to Do It:
- Use a light source from one angle—shade the opposite sides.
- Add a soft highlight on the top face using lighter tones.
- Use slightly darker hues on one side to give a 3D feel.
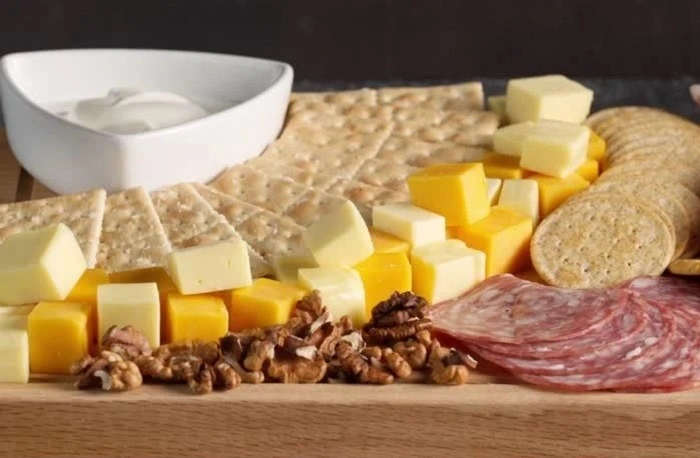
4. Stack or Scatter for a Realistic Scene
Cubes rarely appear alone—arrange them in piles, bowls, or on toothpicks.
How to Do It:
- Draw 3–5 cubes overlapping with soft shadows beneath.
- Place them in a paper tray, lunchbox, or wooden board.
- Stick a party pick or small flag in one for variety.
5. Use Soft Edges or Imperfections for Realism
Cubes aren’t always perfectly sharp in real life—they may have soft corners or bite marks.
How to Do It:
- Round off corners slightly with gentle curves.
- Add small dents, knife marks, or irregular shadows.
- Show slight melting or oil shine on the surface for fatty cheeses.
6. Choose the Right Color Palette
Color brings your cubes to life and defines the type of cheese.
How to Do It:
- Stick with warm yellows, oranges, soft creams, and pale whites.
- Use soft gradients for shading—not harsh lines.
- Complement with neutral backgrounds like wood, parchment, or marble.
Choose the Best Drawing Style for Your Purpose
For Recipe Cards or Food Blogs
Semi-Realistic Style
Use clean shading, slightly softened corners, and warm tones to show delicious, ready-to-eat cubes.
For Educational Charts or Nutrition Labels
Minimalist and Clear
Keep cubes neat, with clear outlines and uniform coloring. Label each with its cheese type or nutritional info.
For Party Posters or Lunchbox Themes
Cartoon and Fun
Add smiling faces, googly eyes, or party hats to the cubes. Use exaggerated perspectives or pastel tones for a playful touch.
How to Store and Use Your Cheese Cube Illustration
Keep Physical Drawings Clean
- Use rulers for crisp edges and shading guides for even tone.
- Store flat or frame for presentation.
Save Digital Art in Organized Folders
- Export layered PSD or vector files for future edits.
- Save transparent PNGs for use on menus, flyers, or recipe cards.
- Label files clearly: “Cheddar_Cubes,” “Pepperjack_SnackBox,” etc.
Repurpose Across Media
- Use in charcuterie board illustrations.
- Add to grocery labels, lunchbox infographics, or food safety guides.
- Included in meal-tracking apps or educational materials for kids.
Frequently Asked Questions (FAQs)
What shape should cheese cubes be?
Standard cheese cubes are square, with equal sides—typically about 1 inch. Use perspective to give them 3D volume.
Can I draw multiple cheese types in one scene?
Absolutely! Show a mix—yellow cheddar, pale mozzarella, and spicy pepper jack for contrast and flavor diversity.
Should cheese cubes have texture?
Yes—use soft edge detailing, tiny holes (for Swiss), or specks for seasoned cheeses to increase realism.
What background works best for cheese cube drawings?
Wooden boards, picnic tables, or bento-style trays work well. They add warmth and context without overpowering the cubes.
Can I add fun elements to cheese cube art?
Definitely! Draw them with arms, faces, or wearing party hats for kids’ content, or show melting cheese for dynamic realism.