
Banana bread made with sour cream feels different, sure – yet that’s only part of what happens. Omitting it reveals hidden effects on how wetness stays locked in, along with crust color development. Ripe bananas typically handle sugar duties plus water supply. However, introducing fats paired with acidic elements – say, butter meeting lemon juice or vinegar – quietly reshapes the crumb. Here, sour cream pulls double duty. Roughly one-fifth fat by weight, yes – though its real role sparks when lactic acid meets baking soda. Right away when stirred together, the mix starts reacting – no need to wait for heat. Gas escapes more quickly because of it, leaving behind tighter bubbles inside. The result? A heavier texture than what you get with buttermilk, despite similar acidity levels.
Table of Contents
Banana Bread Simple Ingredients
| Ingredient | Purpose |
| Ripe bananas | Sweetness and moisture |
| Sour cream | Adds fat and acidity |
| Butter | Adds richness |
| Eggs | Build structure |
| Brown sugar | Helps retain moisture |
| Flour | Forms the loaf |
| Baking soda | Creates lift |
| Salt | Balances flavor |
| Cinnamon, optional | Adds warmth |
| Nutmeg, optional | Adds depth |
Why Sour Cream Changes Banana Bread
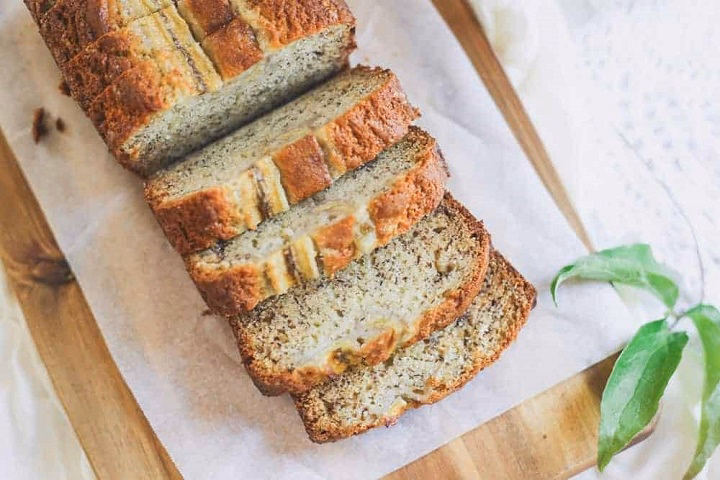
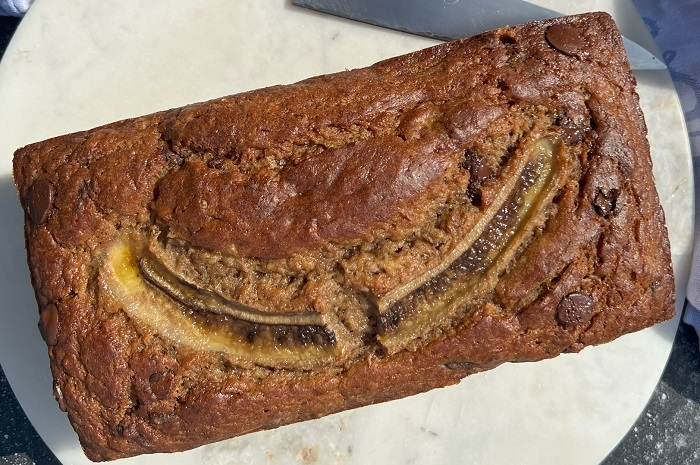
Some web-based recipes see sour cream just as extra taste. Actually, it changes how starch turns in heat. When flour soaks up moisture while cooking, the shift happens step by step. Sour cream brings more protein and fluid, which gently drags out that change, keeping the middle soft past usual timing. That means fewer splits on the crust – though sometimes texture pays a quiet price. A split running wide usually means the loaf expanded well during baking. When that gap doesn’t form, the crust stays closed – giving the impression of something dense inside, regardless of actual doneness.
Sour Cream vs Other Dairy Options
| Ingredient | Result |
| Sour Cream | Soft crumb and longer freshness |
| Buttermilk | Lighter texture |
| Yogurt | More moisture |
| Crème Fraîche | Similar results |
| Milk | Less richness |
Preparing the Wet Ingredients
Start by smashing the bananas right away. Their position in the steps makes a difference here. Get out two that are medium to large, roughly 300 grams once skin is gone. Since older fruits lose liquid, their size alone won’t tell the full story – weighing beats guessing. Mix in the warm butter during crushing; it wraps around strands before steam has a chance to slip free. Start by stirring in the sour cream. Go for full fat if you can – low-fat types often include additives such as cellulose gum, and that might leave a slightly bouncy film close to the edge. Bursting into the mix, eggs come after. They slide in easier when warmed up a bit. If they are cold, things clump – just for a second – and leave trails that won’t smooth out. Beat them alone first, then pour in. The kind of sugar shifts how far it spreads. Not just flavor – the brown type wins – thanks to sticky moisture locking onto sour cream’s web-like strands.
Preparing the Dry Ingredients
Start by gently filling your measuring cup with flour using a spoon. Scooping packs it down too much – density builds quickly that way. Toss in baking soda along with salt; throw cinnamon in there only if you feel like it, plus just a touch of nutmeg when the mood strikes. That cinnamon isn’t hiding anything – it brings out depth, though every imperfection still shows. Give everything a proper whirl until fully combined. Chunks left behind will turn into hollow spots once baked.
Dry Ingredient Mix
| Ingredient | Purpose |
| Flour | Structure |
| Baking Soda | Rise |
| Salt | Flavor balance |
| Cinnamon | Extra warmth |
| Nutmeg | Mild spice notes |
Basic Recipe for Banana Bread With Sour Cream Method
Ingredients
- 2 medium to large ripe bananas (about 300g peeled)
- Sour cream
- Warm butter
- Eggs
- Brown sugar
- Flour
- Baking soda
- Salt
- Optional cinnamon
- Optional nutmeg
- Optional walnuts or chocolate chips
Steps
- Mash the bananas thoroughly.
- Stir in the warm butter.
- Add the sour cream.
- Beat the eggs separately and mix them in.
- Add the brown sugar.
- Combine the dry ingredients in another bowl.
- Add half the dry mixture to the wet ingredients.
- Stir gently.
- Add the remaining dry ingredients.
- Mix only until no streaks remain.
- Fold in walnuts or chocolate chips if desired.
- Transfer to the prepared loaf pan.
Why Mixing Matters
Start by mixing part of the dry ingredients into the wet ones. Mix it just enough to blend. Next comes the remaining dry portion – stir until you see nothing streaky. Working the batter too long builds up gluten. Even though sour cream makes things soft, rough handling turns texture rubbery. At this point, slide in walnuts or chocolate bits if they’re part of your plan. Heavy mix pulls them down fast. A light coat of flour keeps clumps from forming – just a single spoon sprinkled can make the difference.
Flour acts like a shield, stopping soggy spots before they start.
Easy Add-Ins
- Walnuts
- Pecans
- Chocolate chips
- Cinnamon
- Nutmeg
- Dried fruit
Choosing the Right Baking Pan
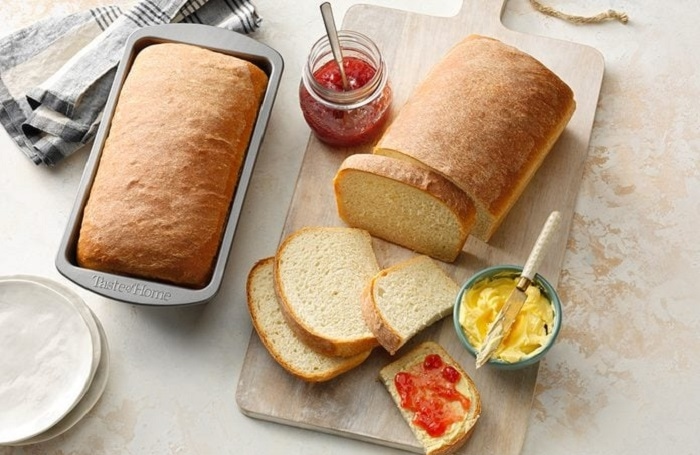
Picking the right pan changes how things turn out. Since metal warms up quicker than ceramic, it speeds cooking. Though dark metal deepens crust color, the sides might burn while the middle stays soft. In contrast, light-colored aluminum sends back more heat. Spread fat across the surface first, after that add a paper liner just on the base. Patches of sticky residue tend to linger when non-stick spray is used. Still, butter combined with flour does its job – yet a paper liner slips right off, leaving no rips behind.
Pan Comparison
| Pan Type | Result |
| Dark Metal | Darker crust |
| Light Aluminum | More even baking |
| Ceramic | Slower heating |
| Glass | Holds heat longer |
Baking the Loaf Properly
A quiet thing nobody talks about – ovens often heat unevenly. Some creep 10 to 15 degrees above or below what you set. Relying on the built-in dial might mislead. Try a separate oven thermometer instead. Wait until it reads steady before starting. Position the rack somewhere in the middle zone. Slide the baking dish inside without jostling. Set temperature to 350°F. Peek early, around minute fifty-five. Don’t wait for a timer alone. Cooking fully means more than how it looks inside. Try checking with a thermometer – it needs to show 200–205°F (93–96°C) using a quick-read tool.
Baking Guide
| Check | Target |
| Oven Temperature | 350°F |
| First Check | 55 Minutes |
| Internal Temperature | 200–205°F |
| Cooling Time | 10 Minutes |
Why This Bread Stays Fresh Longer
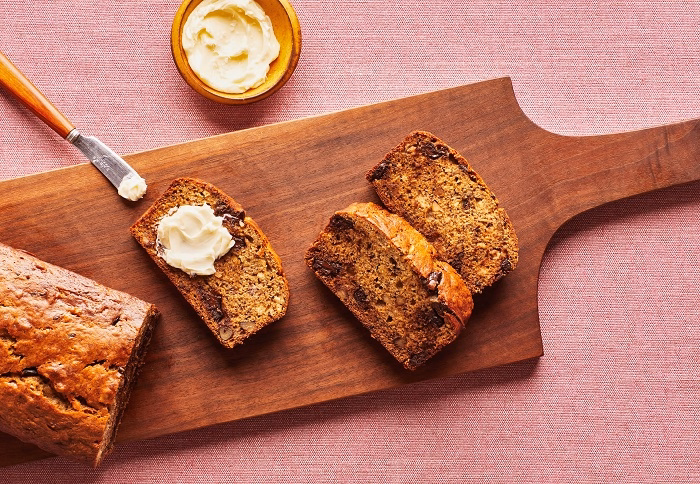
What makes this one stick around more? A touch of sour cream nudges the acidity up just enough. When bananas sit out, they darken quickly – thanks to natural enzymes at work. That little acid shift slows the whole process down. Less free moisture also means trouble for mold trying to grow. Foil keeps it fresh on the counter for three or four days. Slices freeze just fine, warm up slowly outside the freezer, skip the toaster. Most times, this bread stays fresh longer than expected. Left out without cover, though, moisture slips away slowly. The air around it matters quite a bit. Where humidity runs high, trapped drops gather in wrapping, making outer layers limp. Slipping a dry paper sheet under shiny wrap pulls extra wetness out.
Sour Cream Substitutes
Thick yogurt might slip in where sour cream goes, though it moves quicker in mixtures. A runnier blend can leave damp lines behind. What crème fraîche brings? Close match, yet price jumps without much gain. Here’s the catch: buttermilk holds almost no fat at all. Without tossing in more oil, things turn out flat. Sourness stays, but the feeling changes too much.
Substitute Comparison
| Substitute | Result |
| Greek Yogurt | Similar but thinner |
| Crème Fraîche | Very close match |
| Buttermilk | Less richness |
| Sour Cream | Best balance |
Why Small Changes Matter
What pushes this ahead isn’t one big change. It’s how things happen later instead of sooner – starch firming up slowly, bubbles forming at a steady pace, color building held back slightly. Each tiny shift feeds into the next, stretching freshness much longer – possibly twenty-four hours. Nothing dramatic here. Simply consistent. Start with yesterday’s loaf instead of tossing it. Try slicing into chunks, then slow-roasting until crisp – drizzle with olive oil, a pinch of salt, maybe some crushed rosemary. Another path? Mix torn pieces right into the pancake mix when cooking mornings. The softness transfers just fine. From that era, recipe books laid out different tries next to each other. Still, most bakers now follow the habit without knowing its start – just believing it brings softness.
Yes, it works. Yet gently – no noise, just hidden movements underneath everything. The softness does not come from one ingredient alone. Sour cream, bananas, moisture, heat, and time all move together. Nothing dramatic happens. Just small adjustments stacking on top of one another. That quiet consistency is what keeps this loaf around. Not because it is flashy, but because it stays tender long after many others have already dried out.